Why “direct editing”
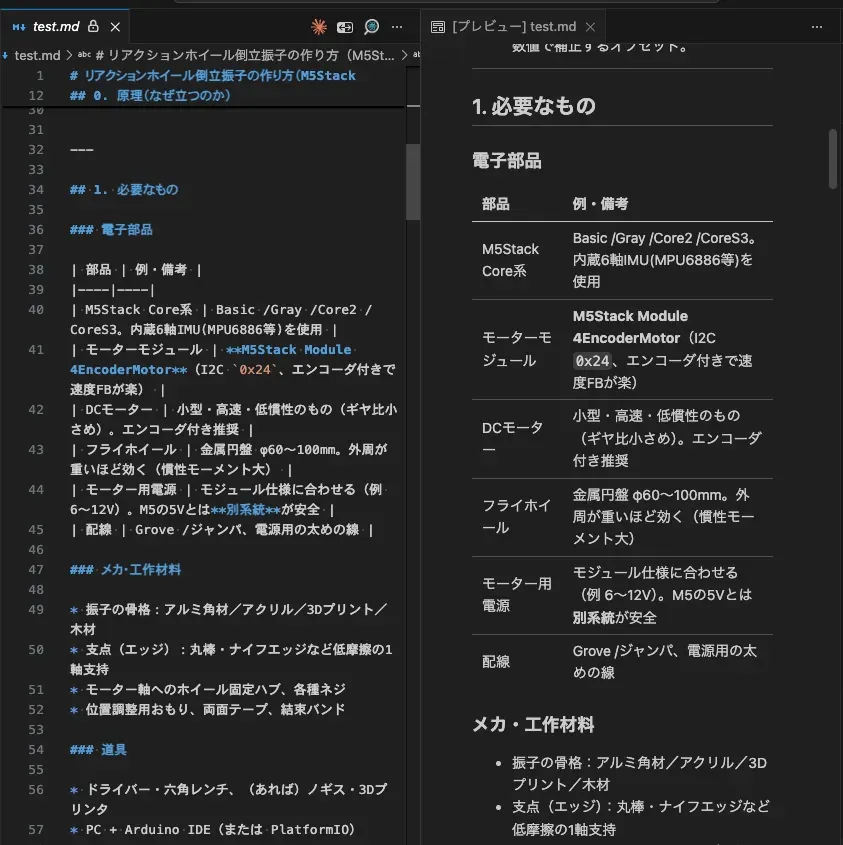
In VSCode you can view a Markdown preview in Split View, but since the preview uses screen width, it’s smarter to be able to edit it directly. Especially in development where you write articles alongside an AI, not having to go back and forth between preview and editing makes it considerably easier to use.
The standard split editor also lets you read rendered Markdown, but since it uses screen width, it squeezes your workspace.
What using the meo extension gives you
What I’d recommend here is a VSCode extension called meo.
With meo, you can edit while seeing the rendered state, like below. Whereas the standard editor displays raw Markdown as-is, meo lets you edit directly while keeping the rendered state.
| Target | Standard editor | meo extension |
|---|---|---|
| Tables | 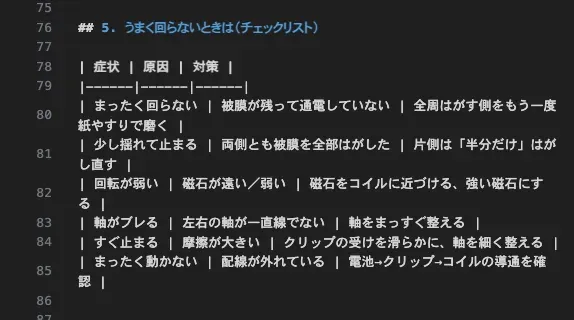 | 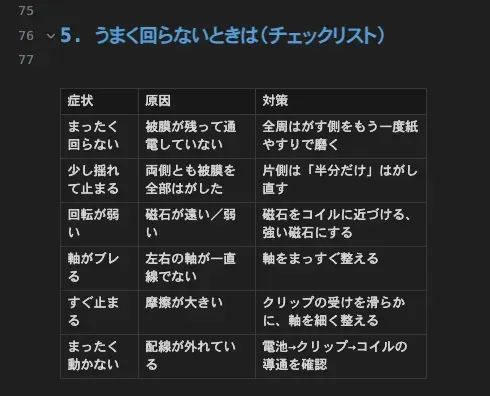 |
| Headings and text styling | 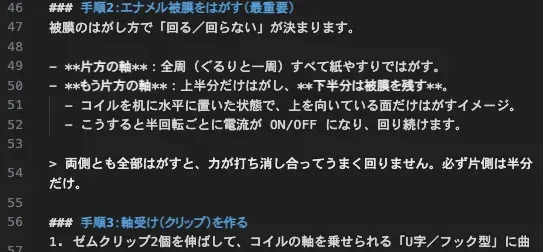 | 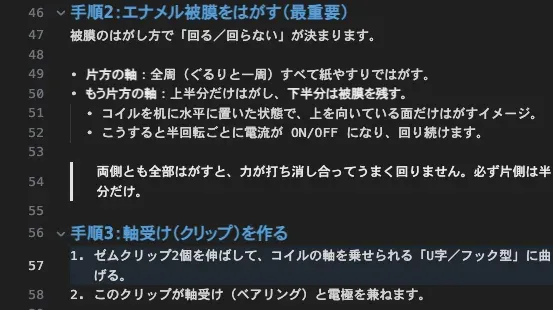 |
You can also keep a table of contents alongside while editing, and check Git diffs and so on.
Setup steps
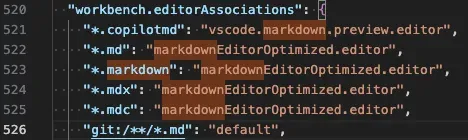
In VSCode, press ⌘+,, click the file icon at the top of the modal, and add the following to settings.json.
"workbench.editorAssociations": {
  "*.md": "markdownEditorOptimized.editor",
  "*.markdown": "markdownEditorOptimized.editor", // optional
  "*.mdx": "markdownEditorOptimized.editor", // optional
  "*.mdc": "markdownEditorOptimized.editor", // optional
}
Customizing the theme
You can also customize the theme. The standard theme’s colors are peculiar, so I do it like this.
{
  "id": "custom-theme",
  "name": "Custom theme",
  "colors": {
    "base01": "#D4D4D4",
    "base02": "#D4D4D4",
    "base03": "#373737",
    "base04": "#569CD6",
    "base05": "#529CCA",
    "base06": "#4DAB9A",
    "base07": "#E6E6E6",
    "base08": "#FFA344",
    "base09": "#529CCA"
  },
  "syntaxTokens": {
    "keyword": "",
    "identifier": "",
    "macroName": "",
    "variableName": "",
    "propertyName": "",
    "typeName": "",
    "className": "",
    "namespace": "",
    "operator": "",
    "operatorKeyword": "",
    "punctuation": "",
    "functionName": "",
    "labelName": "",
    "definitionFunction": "",
    "definedVariable": "",
    "number": "",
    "changed": "",
    "annotation": "",
    "modifier": "",
    "self": "",
    "color": "",
    "constant": "",
    "atom": "",
    "bool": "",
    "specialVariable": "",
    "specialString": "",
    "regexp": "",
    "string": "",
    "typeDefinition": "",
    "meta": "",
    "comment": "",
    "tagName": "",
    "attributeName": "",
    "invalid": "",
    "deleted": "",
    "monospace": "",
    "heading": "",
    "emphasis": "",
    "strong": "",
    "strikethrough": "",
    "quote": "",
    "contentSeparator": "",
    "link": "",
    "url": "",
    "processingInstruction": ""
  },
  "fonts": {
    "liveFont": "",
    "sourceFont": "",
    "liveFontWeight": "",
    "sourceFontWeight": "",
    "liveFontSize": null,
    "sourceFontSize": null,
    "h1FontSize": 1.6,
    "h2FontSize": 1.5,
    "h3FontSize": 1.3,
    "h4FontSize": 1.2,
    "h5FontSize": 1.1,
    "h6FontSize": 1,
    "h1FontWeight": "600",
    "h2FontWeight": "600",
    "h3FontWeight": "600",
    "h4FontWeight": "600",
    "h5FontWeight": "600",
    "h6FontWeight": "600",
    "liveLineHeight": 1.5,
    "sourceLineHeight": 1.5
  }
}
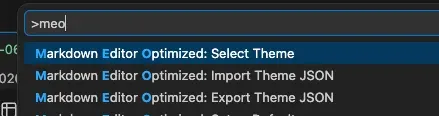
Press ⌘+Shift+P and type ”> meo” to bring up Select Theme, where you can also choose from the existing themes.
Current issues and caveats
While it’s convenient, I’ve also found the following issues for now.
- You can’t input emoji.
- The emoji picker doesn’t appear.
- Occasionally the behavior goes wrong and characters disappear.
References
 https://github.com/vadimmelnicuk/meo